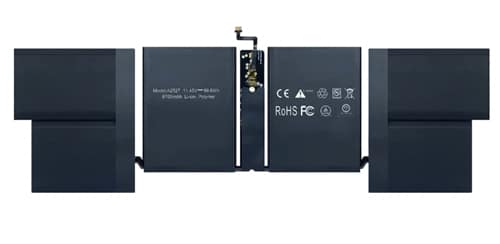
Battery Replacement
MacBook Pro Service
MacBook Pro M1
(13-inch) 2020
MacBook Pro M1 (13-inch) 2020 Battery Replacement

Battery Replacement
TK 15,000
Replacing the battery in a MacBook Pro M1 (13-inch) from 2020 may become necessary over time due to battery degradation or if you’re experiencing issues with battery health and performance. Here’s a guide to help you through the battery replacement process:
1. **Check Battery Health**: Before proceeding with a battery replacement, check the health of your MacBook Pro’s battery. You can do this by going to the Apple menu, selecting “System Preferences,” then “Battery,” and finally clicking on “Battery Health.” Here, you’ll see information about your battery’s maximum capacity and whether it needs to be serviced.
2. **Backup Data**: Before attempting any hardware repairs, it’s crucial to back up your important data to prevent loss. Use Time Machine or iCloud to create a backup of your files, photos, and documents.
3. **Gather Necessary Tools**: To replace the battery in your MacBook Pro M1 (13-inch), you’ll need a set of precision screwdrivers, a spudger tool, and possibly a suction cup (for removing the display assembly). Additionally, you’ll need a replacement battery kit compatible with your MacBook Pro model.
4. **Turn Off Your MacBook**: Shut down your MacBook Pro and disconnect any cables or peripherals connected to it.
5. **Remove Bottom Case**: Use a Pentalobe screwdriver to remove the screws securing the bottom case of your MacBook Pro. Carefully lift off the bottom case to access the internal components.
6. **Disconnect Battery Connector**: Locate the battery connector on the logic board and use a spudger tool to carefully disconnect it from the motherboard. Exercise caution to avoid damaging any surrounding components.
7. **Remove Old Battery**: Depending on the specific model of your MacBook Pro, the battery may be secured in place with adhesive strips or screws. Follow the appropriate procedure to remove the old battery from the chassis.
8. **Install New Battery**: Carefully place the new battery into the chassis and secure it using adhesive strips or screws, following the reverse of the removal procedure.
9. **Reconnect Battery Connector**: Once the new battery is installed, reconnect the battery connector to the logic board using a spudger tool.
10. **Replace Bottom Case**: Place the bottom case back onto your MacBook Pro and secure it with the screws using a Pentalobe screwdriver.
11. **Power On and Calibrate**: After replacing the battery, power on your MacBook Pro and allow it to fully charge. It’s also recommended to calibrate the new battery by fully charging it, then allowing it to discharge completely before recharging to 100%.
12. **Monitor Battery Health**: Keep an eye on your MacBook Pro’s battery health following the replacement. If you notice any unusual behavior or issues, contact Apple Support or visit an authorized service provider for further assistance.
By following these steps, you can successfully replace the battery in your MacBook Pro M1 (13-inch) and restore its battery life and performance. However, if you’re uncomfortable performing the replacement yourself, consider seeking professional assistance from Apple or an authorized service provider.
